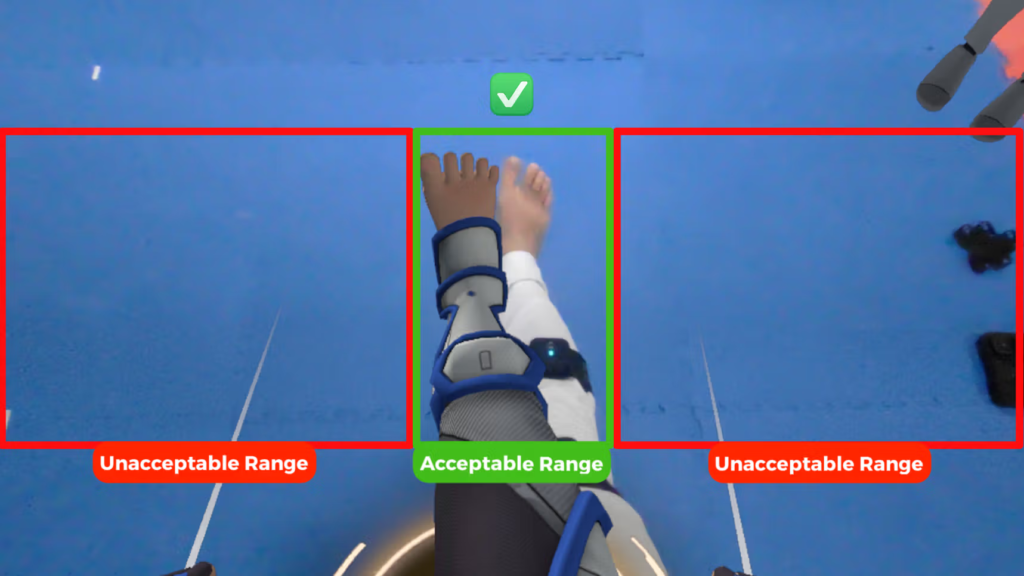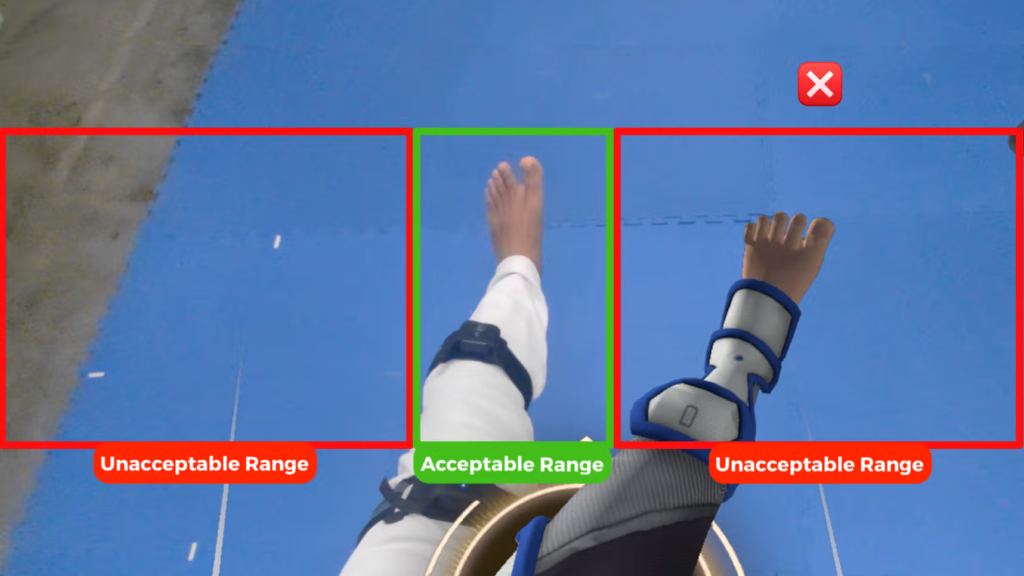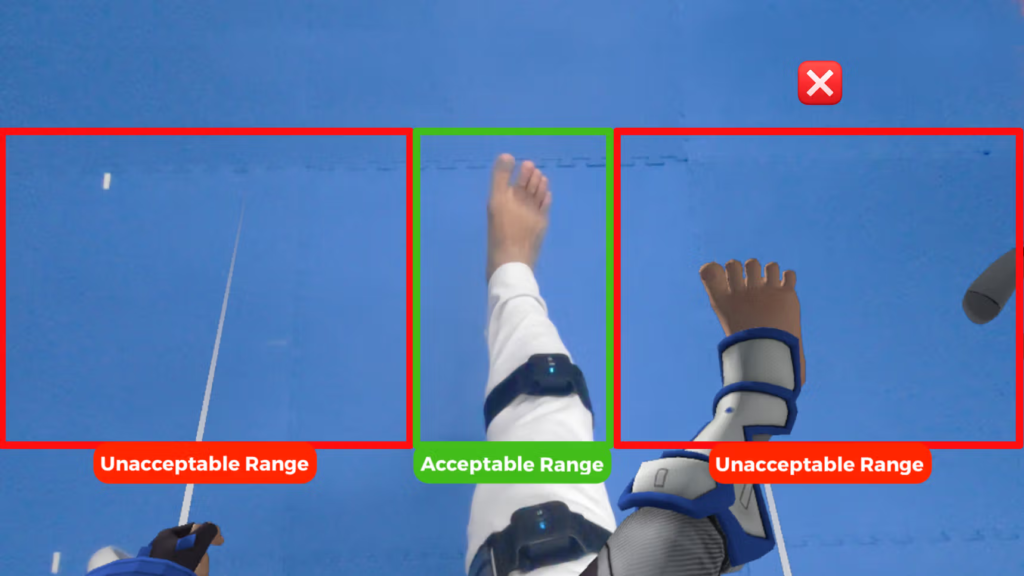
Applicable to Game Version v1.3.0 and above: https://virtualtkd.gg/patch-notes/
v1.2.34 tutorial playlist here.
1. Important Information
The following must be fulfilled before proceeding with the rest of the manual.
- You have the required hardware that includes the following (see more details on Hardware Requirements [2a] below):
- A computer/laptop (refer to specs below)
- AXIS motion trackers
- PICO4/PICO 4 Ultra VR headset (two units)
- Registered your warranty for all devices – Warranty Registration
- VTKD portal System Operator account
- Stable internet connection and a dedicated router
- All VR headsets are charged to at least 80%
- All AXIS units are charged for at least 2 hours
2. Requirements
- Hardware Requirements
Below are the requirements to run 1 VTKD court which consists of 2 VR players.
AXIS full-body Tracking System
Two units of standard AXIS OR three units of AXIS lite, must consists of
- 10 x AXIS nodes.
- 2 or 3 x charging docks.
- 2 x USB A or USB C dongles.
- 2 x dongle adapters.
- AXIS straps and node holders.
VR headset
2 units of VR headsets with controllers.
Compatible PICO models:
- PICO 4
- PICO 4 Ultra
Laptop/Desktop PC for Game Master (GM) + Router Specifications
| Category | Minimum | Recommended |
|---|---|---|
| Operating System | Windows 11 (64-bit). | |
| Processor (CPU) | Quad-core CPU with at least 3.0 GHz (e.g., Intel Core i5-4590 or AMD Ryzen 3 3100). | Six-core CPU with at least 3.5 GHz (e.g., Intel Core i5-12600K or AMD Ryzen 5 5600X). |
| Graphics (GPU) | DirectX 11-compatible GPU with at least 4GB VRAM (e.g., NVIDIA GTX 1050 Ti, AMD Radeon RX 560). | DirectX 12-compatible GPU with at least 6GB VRAM (e.g., NVIDIA RTX 3060 or AMD Radeon RX 6600 XT). |
| Memory (RAM) | 8 GB. | 16 GB. |
| Storage | 20GB of free space. | 20GB of free space on SSD with NVMe support. |
| Display | 1080p resolution. 60Hz refresh rate. | 1440p resolution or higher. 144Hz refresh rate. |
| Power Supply | Always connected to Power (must not on Battery mode) | |
| Router | 1 dedicated router with: • Wi-Fi 6 • Connection to the internet • AX3000 bandwidth or higher • 5GHz connection only | |
* A network setup with Access Point Nodes is not recommended.
- Software Requirements
- AXIS Control Center (installed on PC). You can find the download link here.
- VTKD PC Application for Game Master and Spectator (installed on PC). You can download it on the VTKD portal after logging in.
- VTKD Android Application for VR players (installed on PICO VR headsets). You can download it on the VTKD portal after logging in.
- Other Requirements
Physical Playing Space
- Between 40 to 50sqm open space with no pillars or large objects.
- 4m x 4m play area for each player with a divider between them.
Refer to the Site Assessment Manual to test and verify that the location is suitable for use.
Additional Hardware for Spectator
- Laptop or Desktop PC that has similar specifications as GM.
- External display (monitor, TV, or projector) for spectator feed.
3. Setting Up
a. Account Setup & Build Download
Account type and functions
Below are the 2 different account types and their functions.
*Please be advised that subscription fees may apply in the future.
i. System Operator
- Subscriptions
- Game File Download
ii. Game Master
- Game File Download
Minimum accounts needed to run 1 VTKD court:
- 1 x System Operator account
- 1 x Game Master (GM) account
Activating System Operator account
An email with a one-time-password (OTP) will be sent to your email address that you provide to your local distributor.
*You will not be able to run VTKD without a system operator and a GM account.
You are required to change your password to activate your account. Click on ‘Change’ and you will be redirected to the portal site.
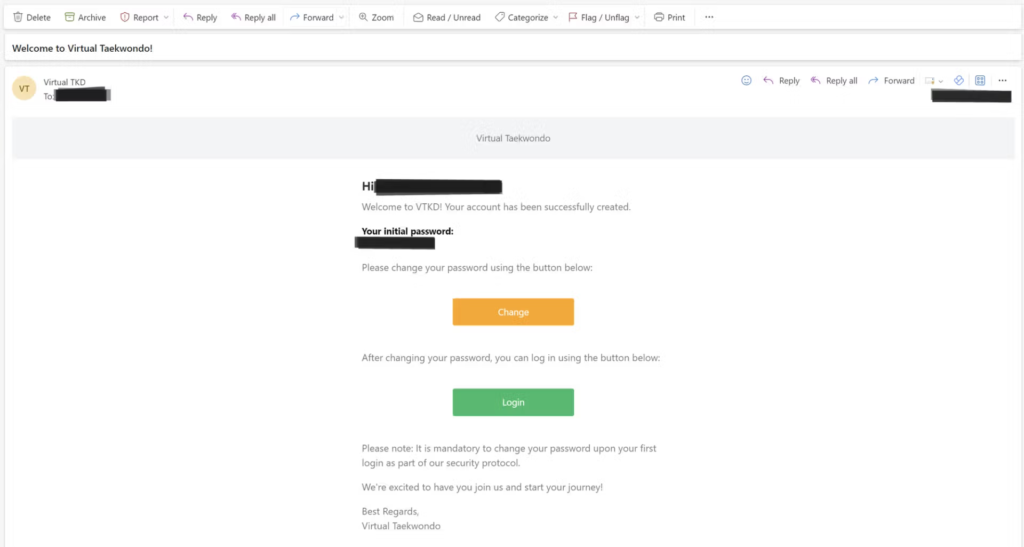
Login with your email and OTP.
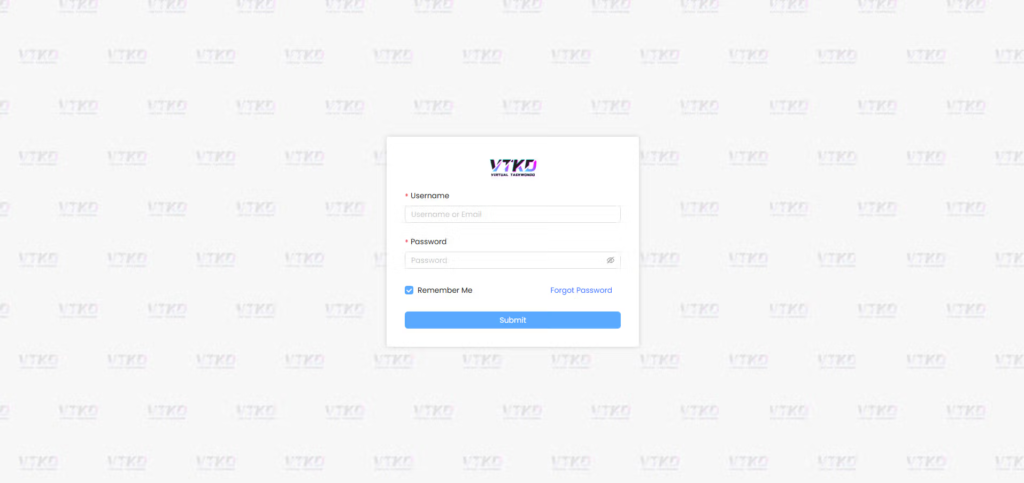
Change your password to activate your account.
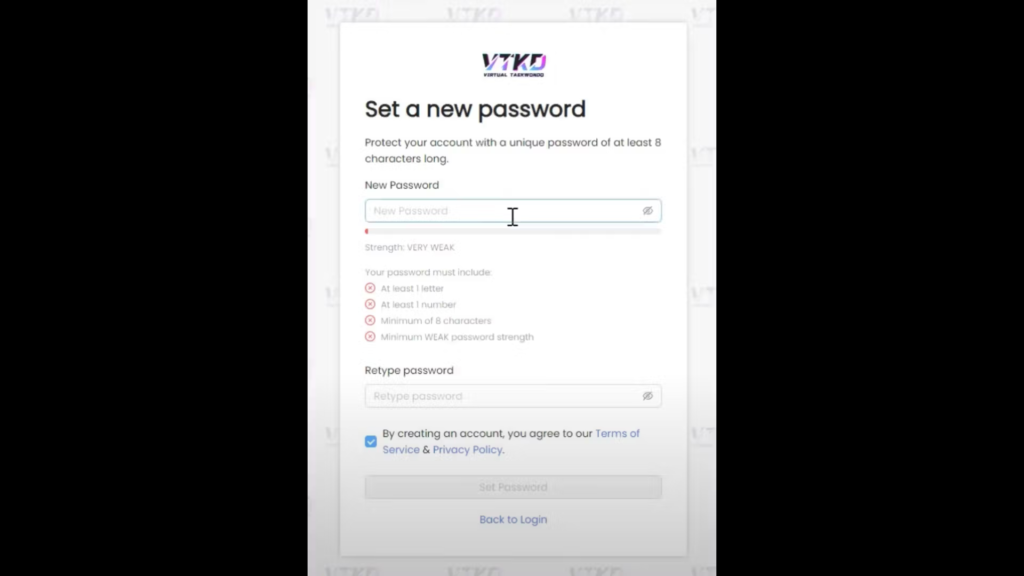
You will be redirected to the login page to re-login with your new password as a System Operator.
Activating Game Master account
1 x GM account will be created for you by the administration. Each System Operator account is entitled to 1 GM account and it is used to log in to the VTKD Game application.
A username and one-time password (OTP) will be issued to you.
Log in to the VTKD portal with your GM username and OTP.
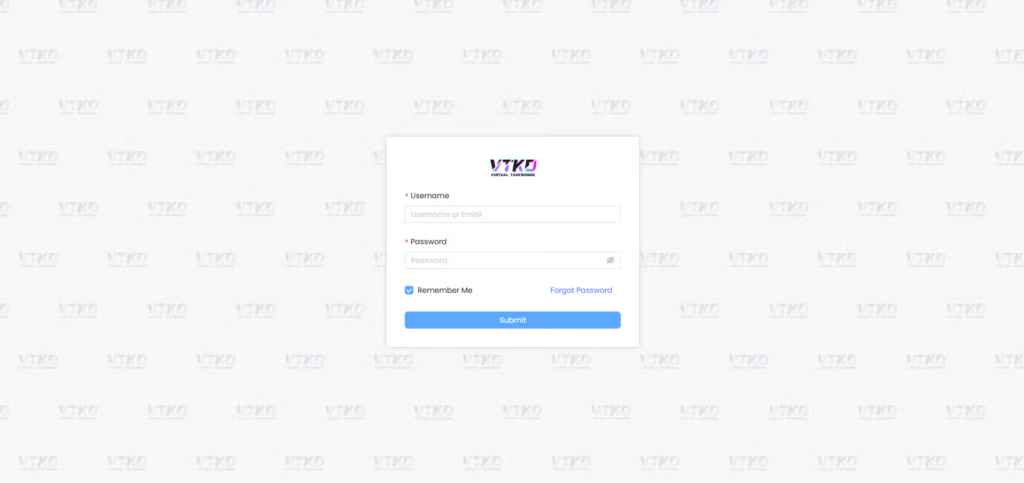
Change your password to activate your account.
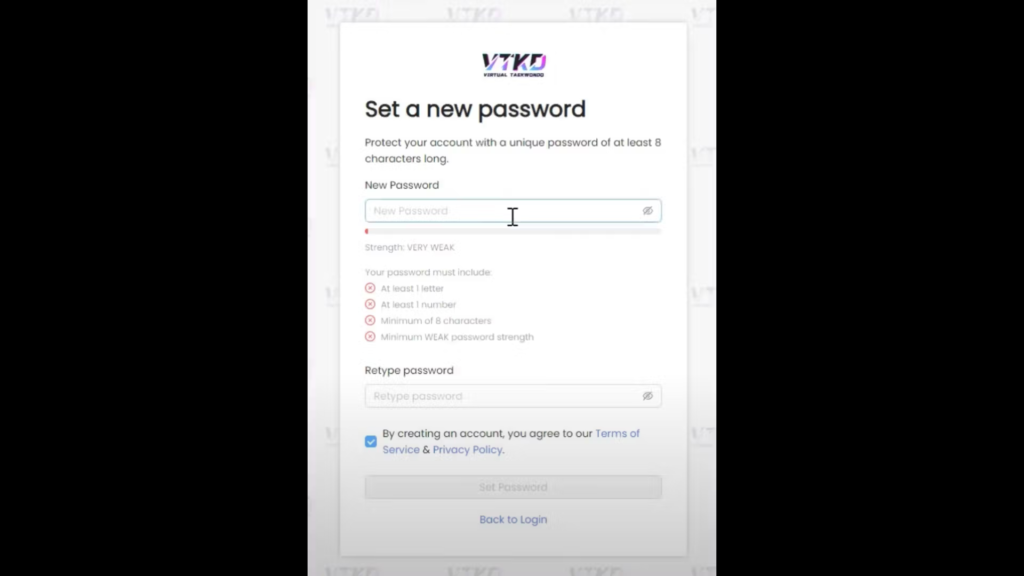
You may now re-login your GM account in the portal.
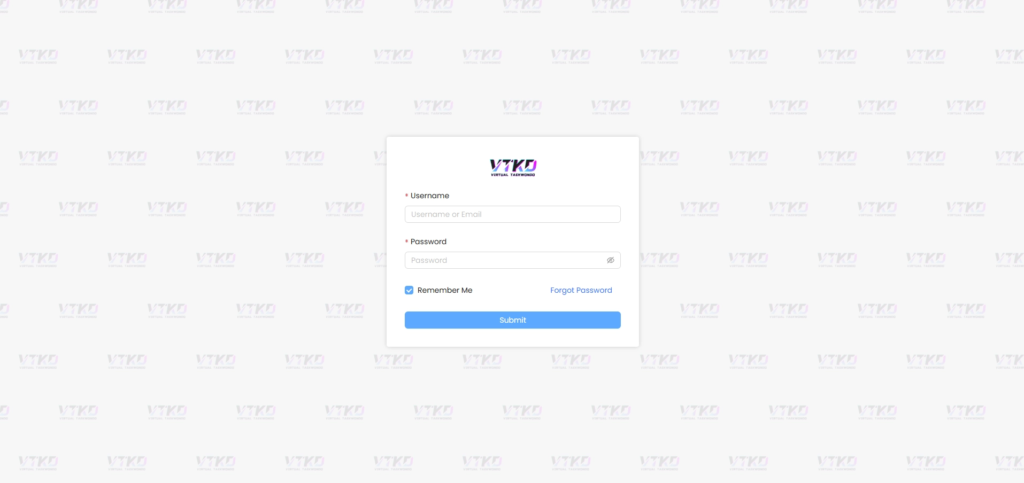
Do this before attempting to login to the VTKD game application on your computer.
Video reference:
Game file download (PC & VR)
There are 2 different downloadable files on the portal that are required for VTKD.
VTKD Software –
- VR Download
- PC Download
Login to VTKD Portal using the System Operator account (login with email) or Game Master (login with username) account.
Select the Organizations tab on the left sidebar, followed by Game Files Download.
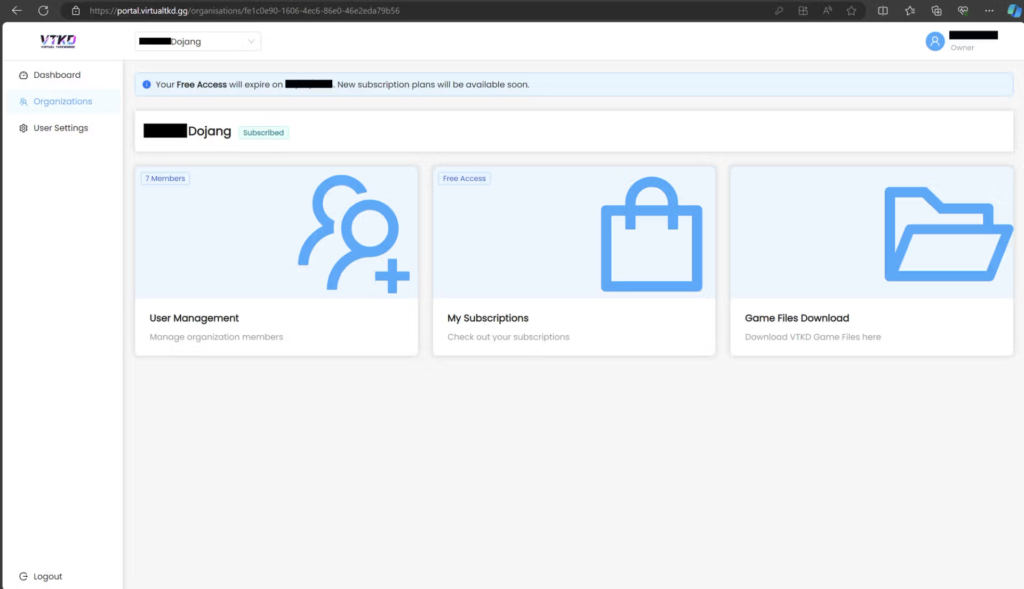
Click on both the VR Download and PC Download to download the VTKD application files. The latest version will always be on the topmost of the page. Both files will be downloaded to your default downloads folder (e.g. C:\Users\User\Downloads).
VR Download – “Android-PICO…”
PC Download – “vtkdu-installer…”
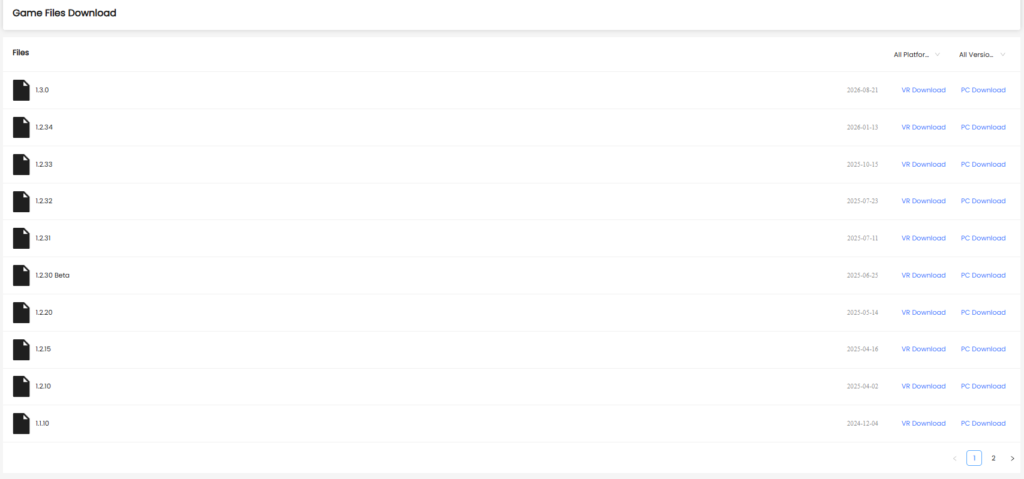
Drag the downloaded files onto your desktop to follow the upcoming steps.
(DO NOT move your downloaded files into other folders)
Video reference:
b. PICO Setup
i. First-Time Setup:
- Complete the PICO initial setup.
- This includes creating a PICO account for VR access.
Pico 4 – https://www.picoxr.com/sg/blog/pico-4-setup
Video reference:
Pico 4 Ultra
Video reference:
You may refer to the official PICO User Guide here.
ii. PICO System Update
- Always update to the latest system version.
- You can locate the System Update in settings under ‘General’ > ‘System Update’.
- Once the System Update file is downloaded, click ‘Update Now’ to install it.
iii. Boundary and Controller Update:
- Confirm the play boundary warning. Select the Custom boundary and draw your play area (recommended min. 4x4m).
Video Reference:
iv. Enable Developer Options (*The Developer option is required to install the Virtual Taekwondo application into the VR headset):
- Navigate to: General > About > Software Information.
- Use the controller trigger to click 8 times quickly on ‘Software Version’ to enable the ‘Developer’ tab.
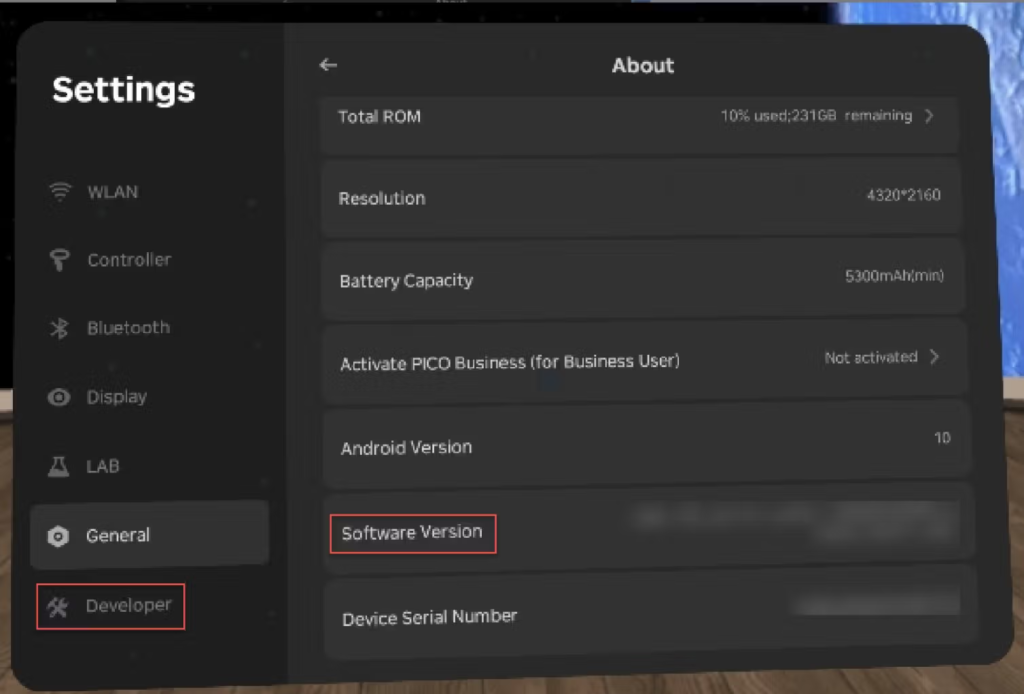
- Go to the ‘Developer’ tab and enable ‘USB Debug’.
- Ensure the USB Connection is set to ‘File Transfer’.
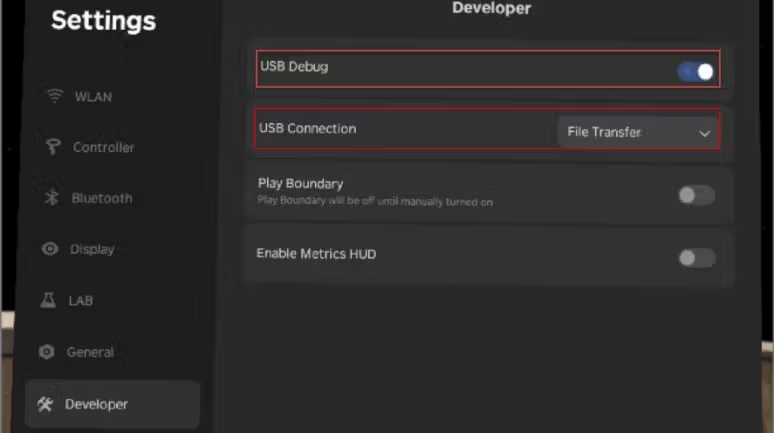
Video reference:
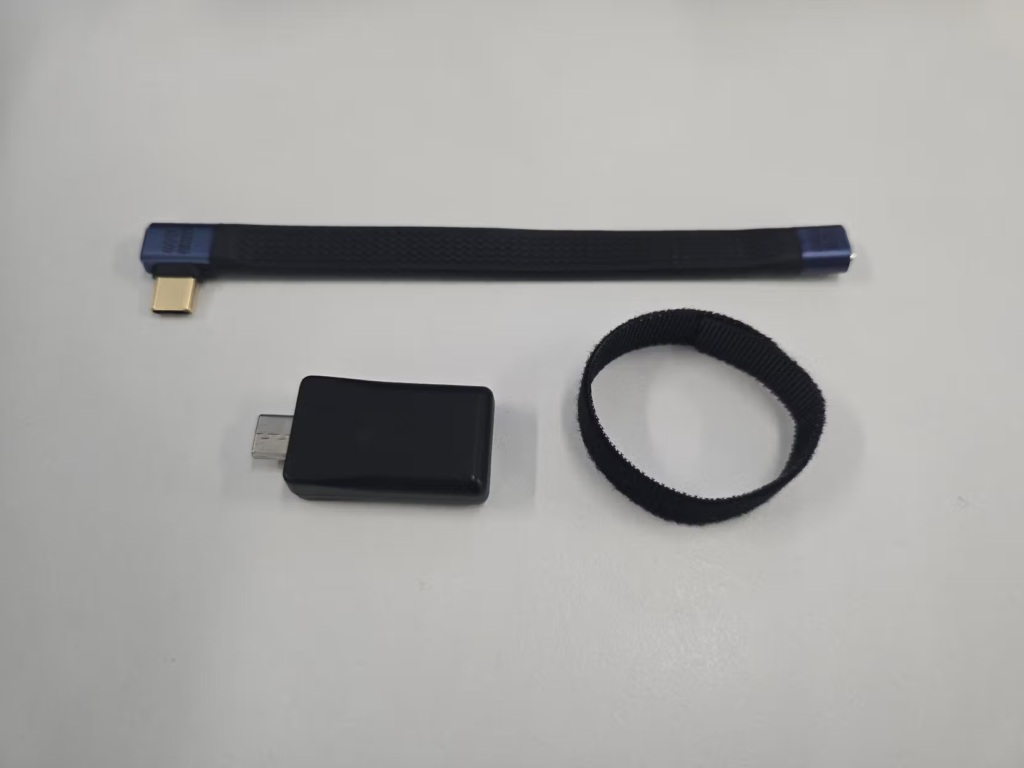
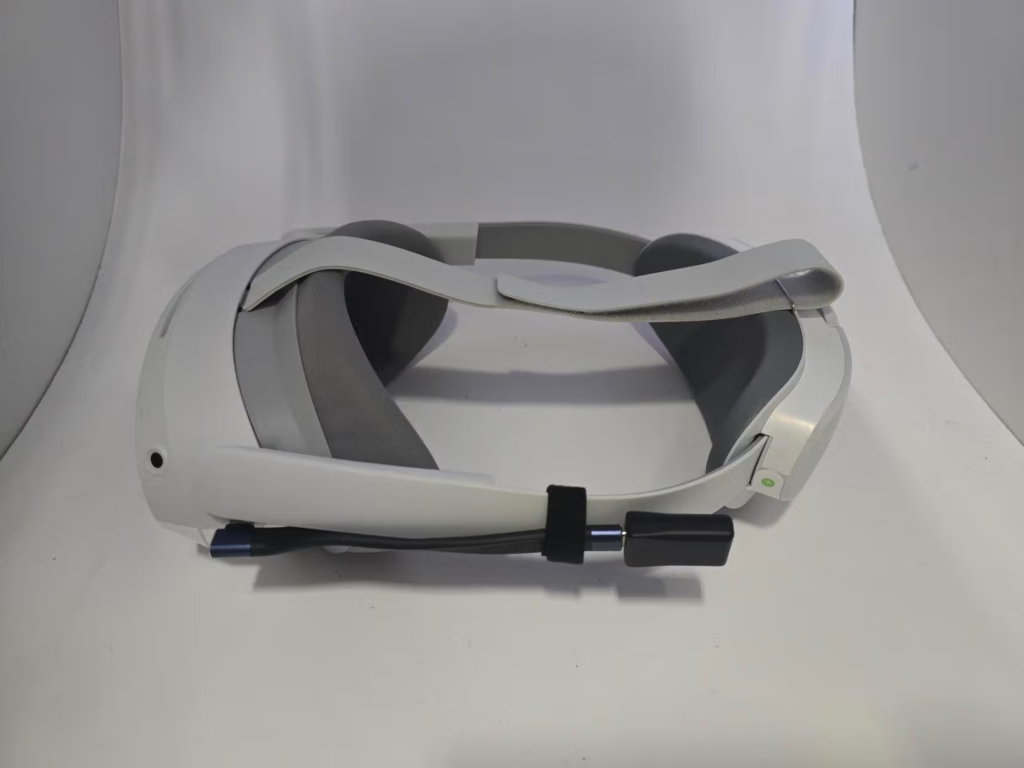
v. Putting on dongle attachment
AXIS Standard USB-A dongle attachment:
- Version 1 – Overhead dongle sleeve
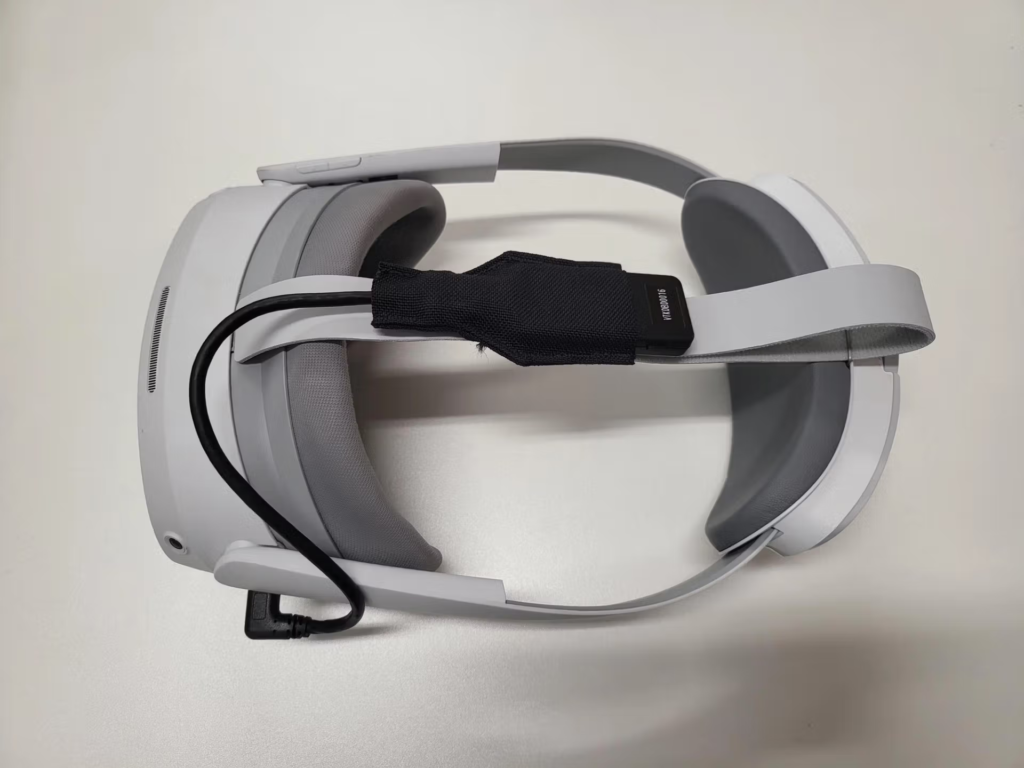
- Version 2 – Side velcro
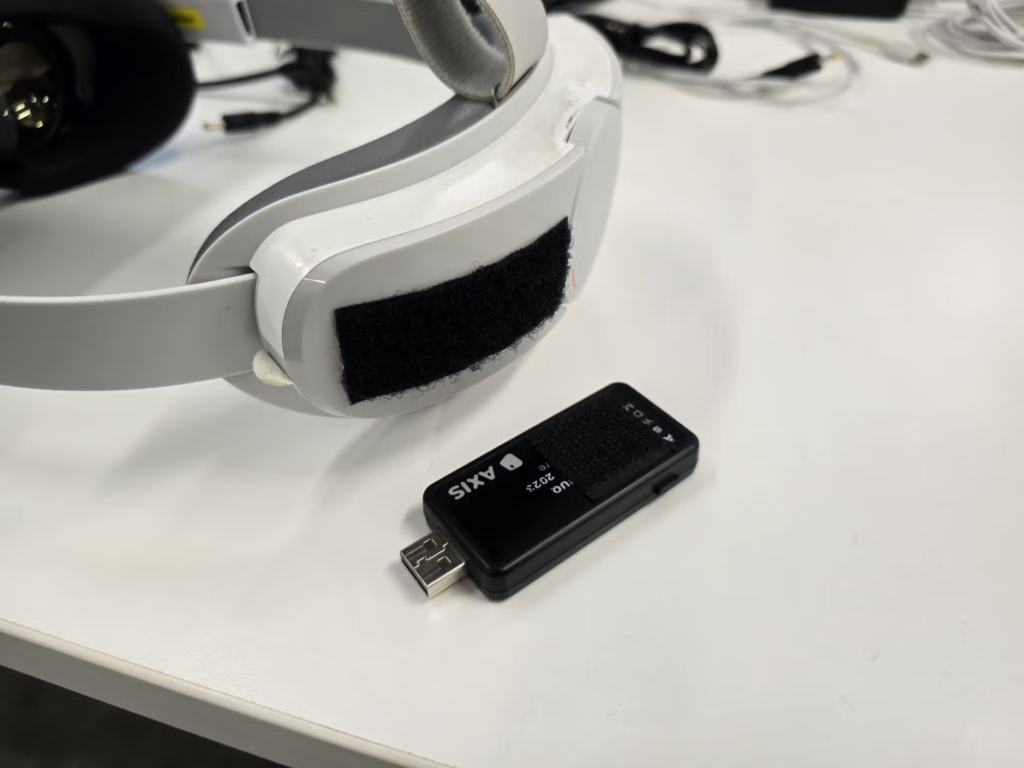
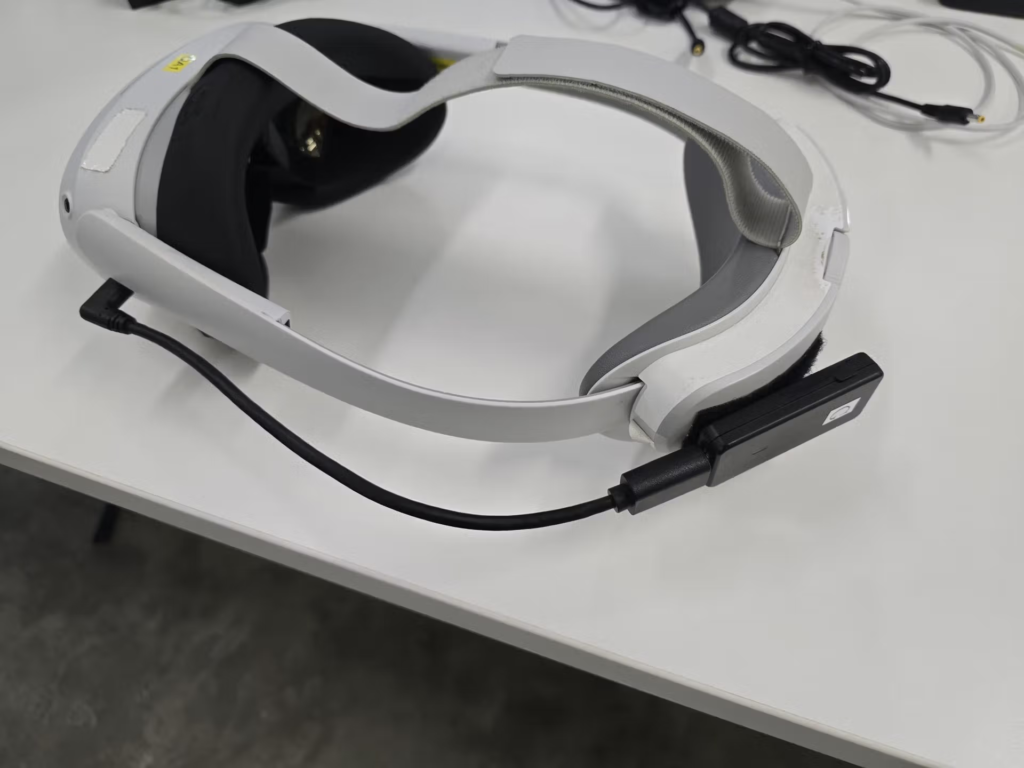
VTKD Box USB-C dongle attachment – Side strap
vi. Recommended Settings (for optimal gameplay and prolong battery life):
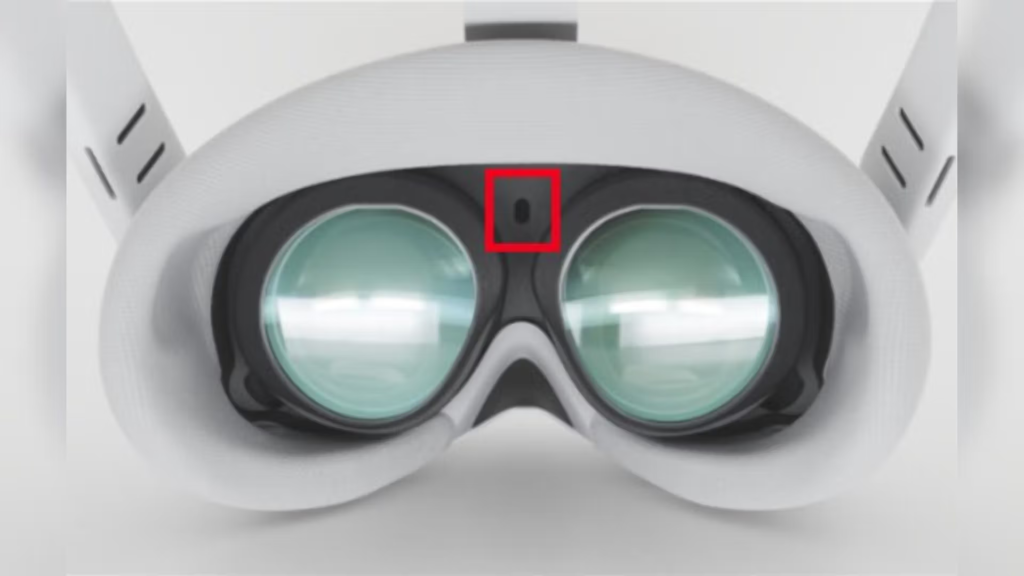
- Cover the infrared sensor with a piece of opaque tape or sticker. This prevents the headset from going to sleep/standby when not worn.
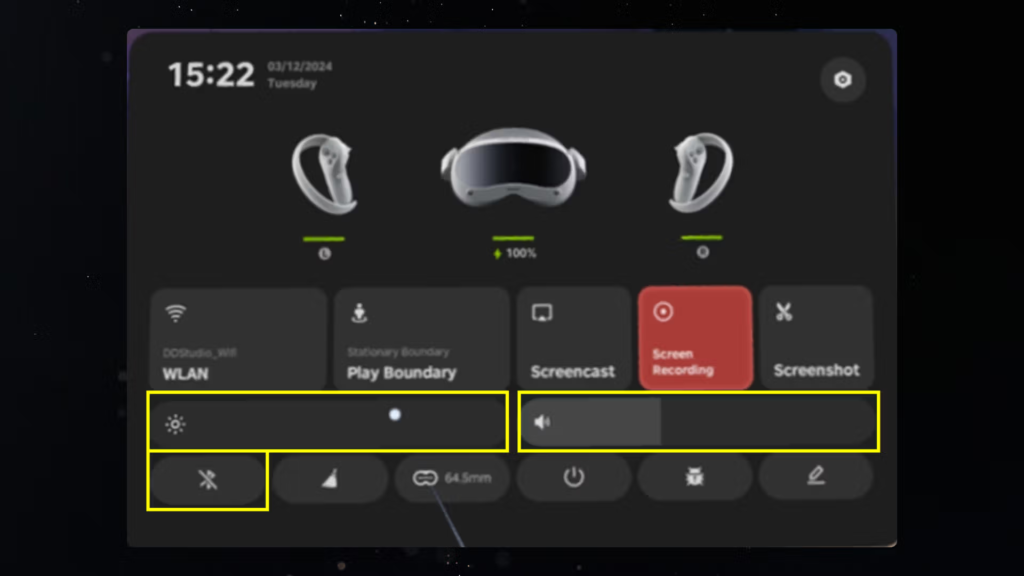
- Set the brightness level to 0.
- Set the volume to a minimum.
- Turn off Bluetooth.
c. AXIS Setup
- Download and Install the AXIS Control Center:
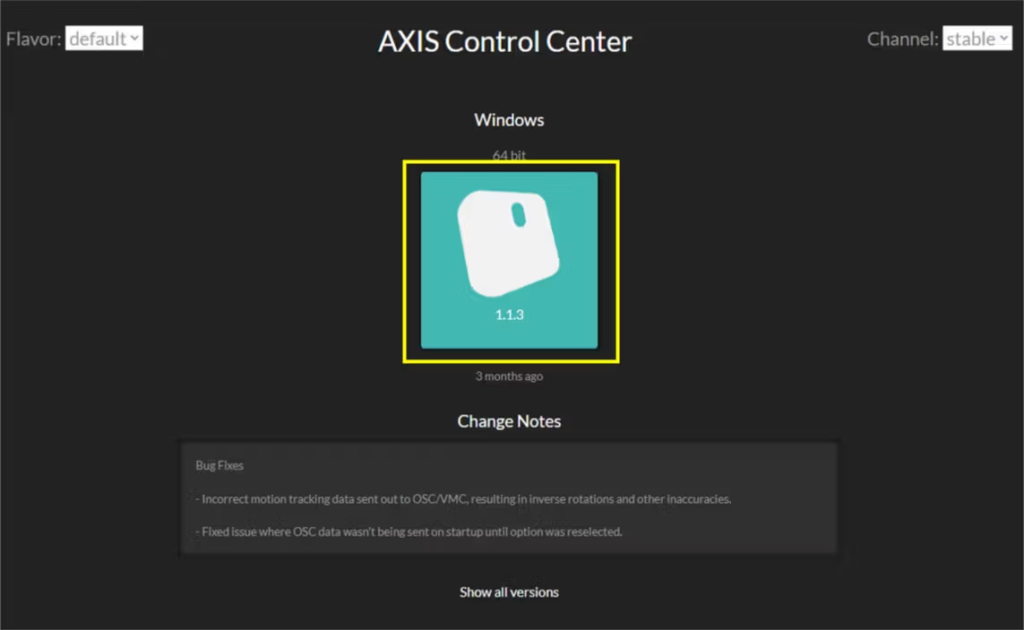
- Follow the prompts to complete the installation.
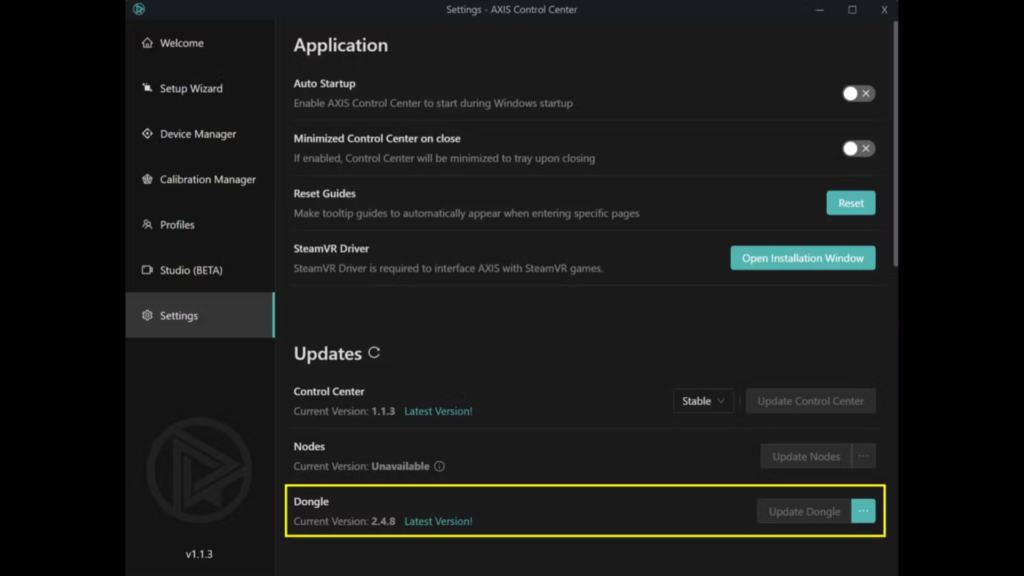
- Update AXIS dongle:
- Once installed, launch the AXIS Control Center
- Connect the AXIS dongle to your PC
- Go to ‘Settings’ > ‘Dongle’ > ‘Update Dongle’ (If your device is up to date, there will be an indication ‘Latest Version!’)
- Pairing AXIS Motion Trackers/Nodes:
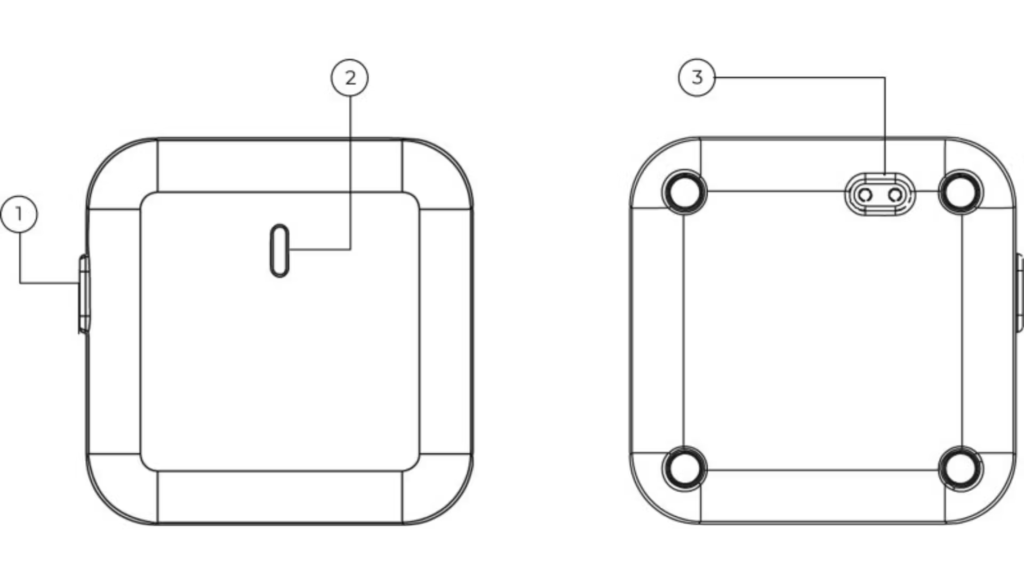
- Set all nodes into pairing mode by pressing and holding the power button (1) until it blinks dark blue (2).
- Click the ‘Set to pairing mode’ button in AXIS Control Center. You will be able to see all the unpaired nodes in the node drawer.
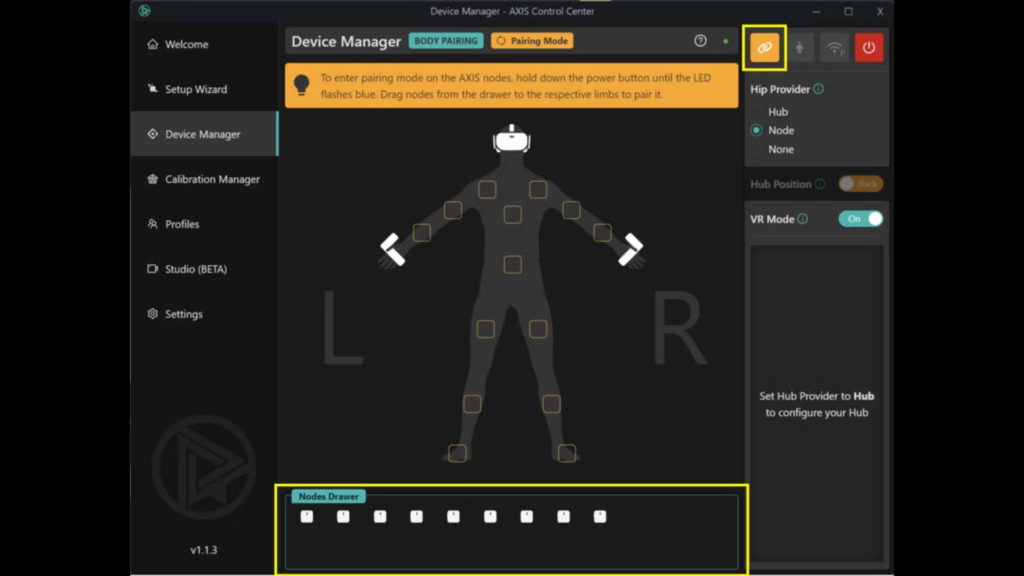
- Drag and drop nodes to the required position for VTKD (Spine, Right Thigh, Right Shin, Left Thigh, and Left Shin).
- You can identify which node corresponds to the one in the node drawer by double clicking or double pressing the button on the physical AXIS node.
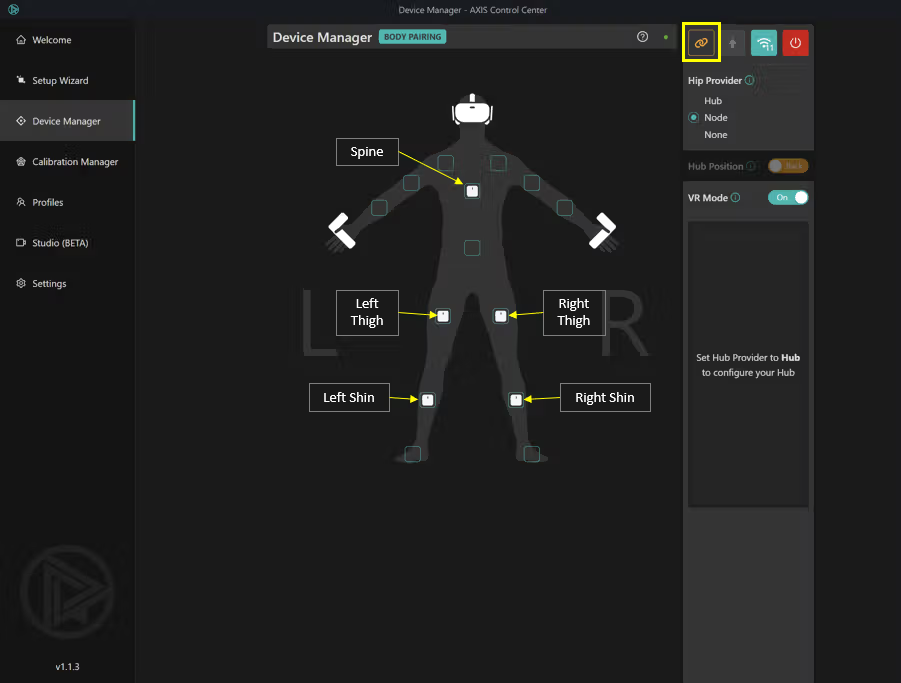
- The placement of the AXIS nodes on the body must match the placement in the AXIS Control Center (i.e. if a node is assigned to the right thigh in the Control Center, the same node must be worn on the right thigh of the player).
- Use a 4-finger space above your knee to place your thigh nodes, and 4 finger space below your knee for your shin nodes.
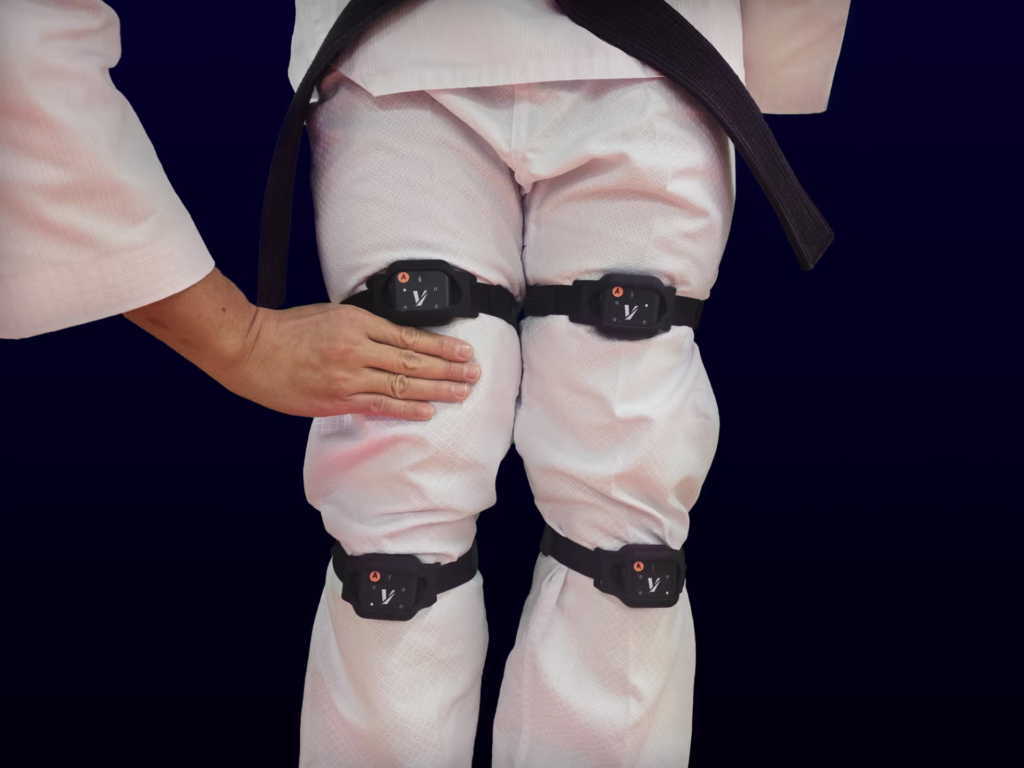
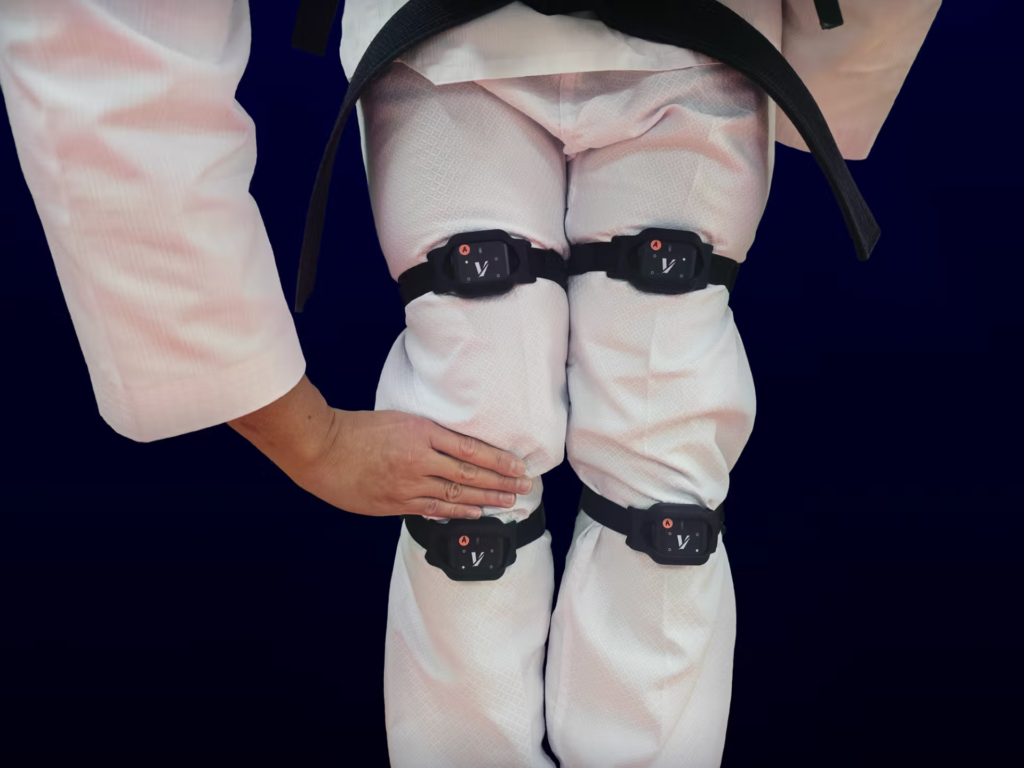
- For the spine node, it should be placed in the upper part of the back, along the middle of the spine. The orientation of all nodes should be facing upwards.
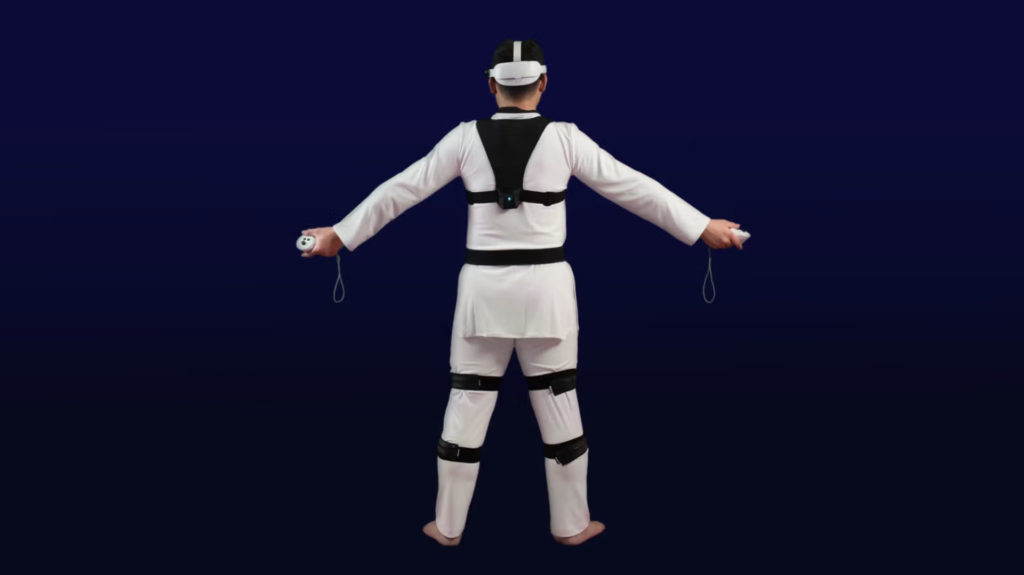
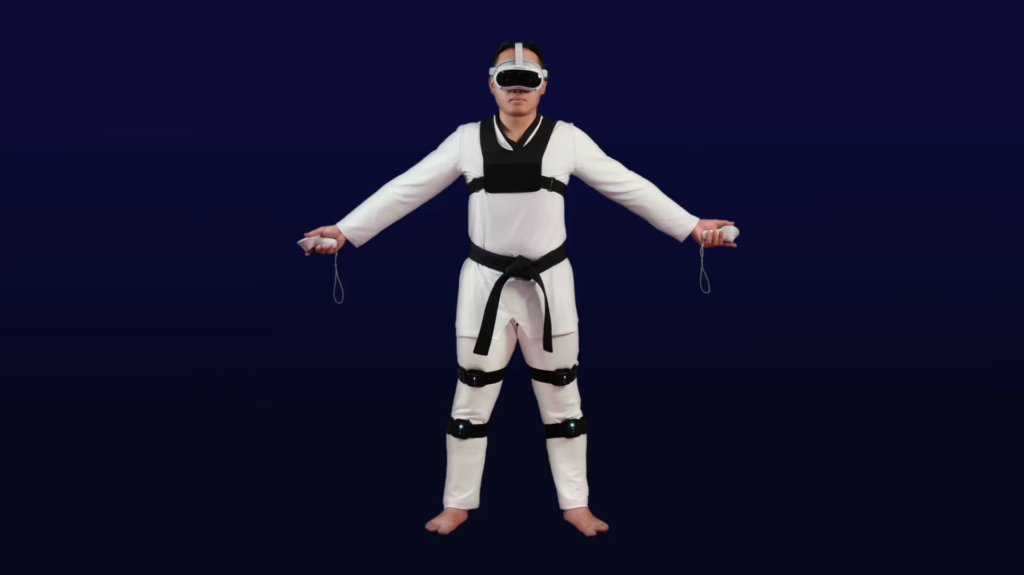
- Pair additional nodes to other body parts like shoulders or arms (It is recommended to update all nodes together to avoid inconsistency in software version).
- Once nodes are placed in position, click on ‘set to pairing mode’ button again to save.
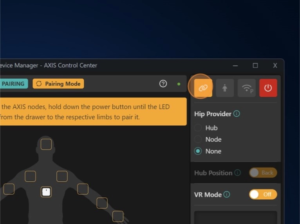
- Update AXIS Motion Trackers/Nodes:
- Go to ‘Settings’ > ‘Nodes’ > ‘Update Nodes’(If your device is up to date, there will be an indication ‘Latest Version!’)
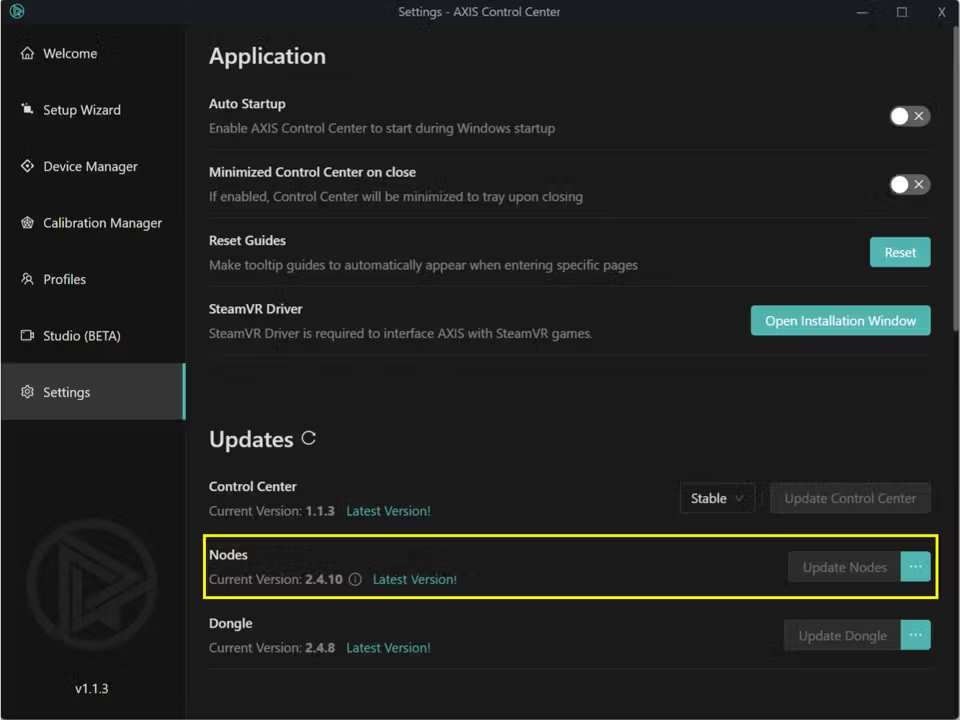
- Once updated, the nodes will turn off automatically.
Video reference:
- AXIS Straps and Node holders:
- Slot in a strap into the node holder with the rubber side facing out
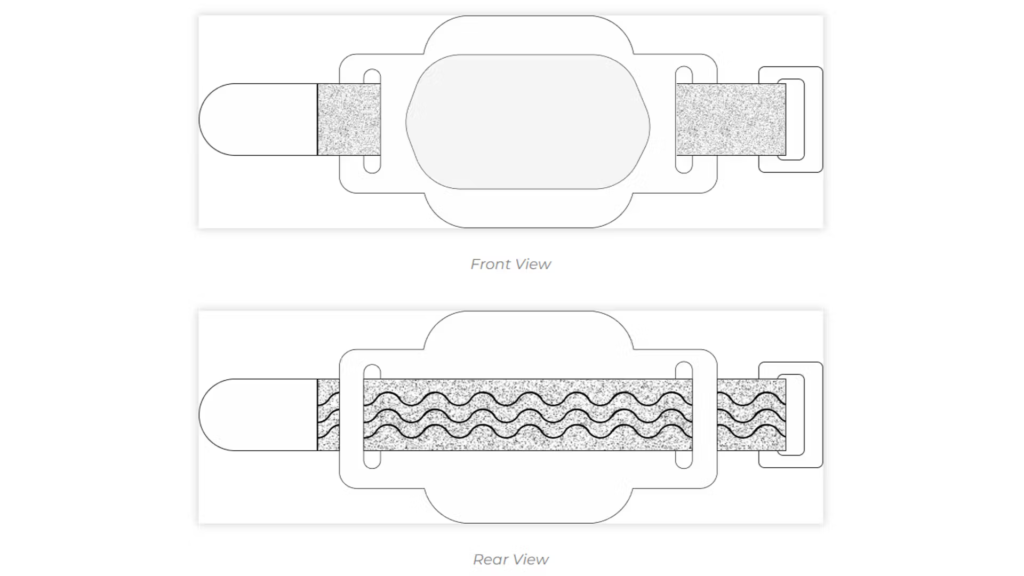
Video reference:
Setting up AXIS WiFi Channels
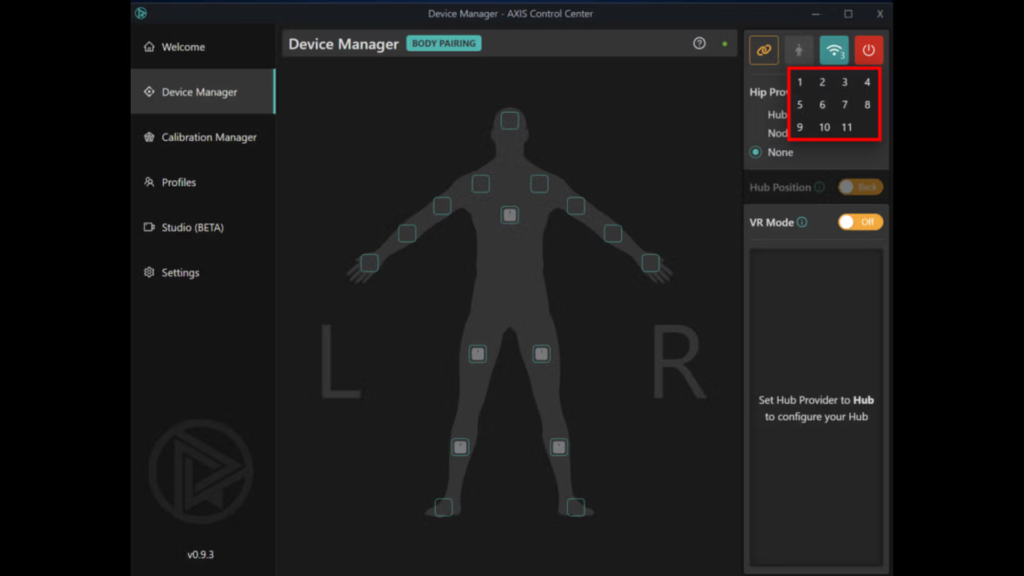
AXIS uses a wireless 2.4Ghz signal to transfer and receive data and has 11 separate channels.
Channels 1, 6, and 11 are the recommended channels to be used as they are not overlapping with each other (Refer to chart below).
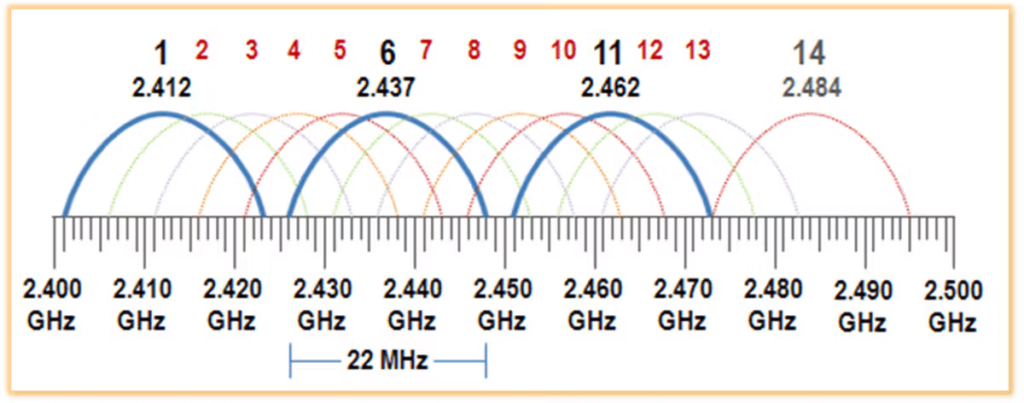
When operating with multiple units of AXIS in the same event space, the general principal as follows –
- For each Court or Field of Play (FOP), the two AXIS sets in use (blue player and red player) should be paired on the same Wi-Fi channel e.g., In FOP A, blue player’s AXIS is paired on channel 1, red player’s AXIS should also be paired on channel 1.
- If there are 2 FOPs, both courts should be on different channels E.g., FOP A nodes on Channels 1 and FOP B nodes on Channels 6.
An important note to take is that at any time, it is recommended to only have 10 nodes turned on, on the same channel. E.g., if both FOP A and B nodes are on channel 1 and turned on at the same time (20 nodes), the AXIS might start to drop in performance.
You may use the ‘WiFiman’ application to identify which Channel is the least congested.
To check for the least congested channel, go to the ‘Scan’ tab to look at the list of ‘2.4Ghz’ networks.
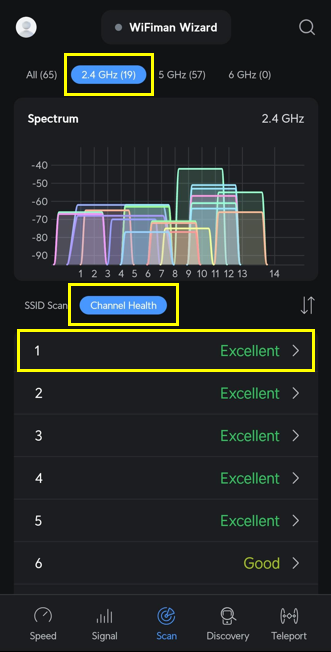
Under the ‘Channel Health’, you can look at the chart of networks in conjuncture with the Channels that are labeled ‘Excellent’.
Video reference:
4. Installing Game Files
a. PC Installation (Game Master & Spectator)
*If you have an older software which requires an update, UNINSTALL the old software from your PC before installing the new version.
- Locate the ‘vtkdu-installer…’downloaded game fille as explained under Account Setup & Build Download.
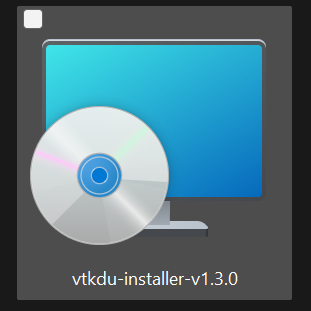
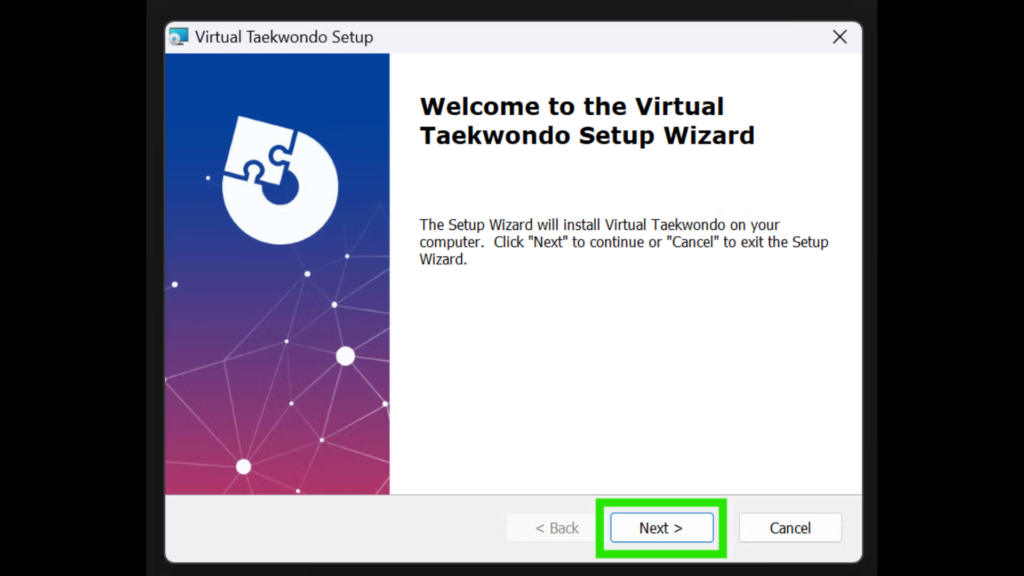
- Double click on the installer file to launch the Virtual Taekwondo Setup Wizard.
- Click ‘Next’ on the Setup Wizard.
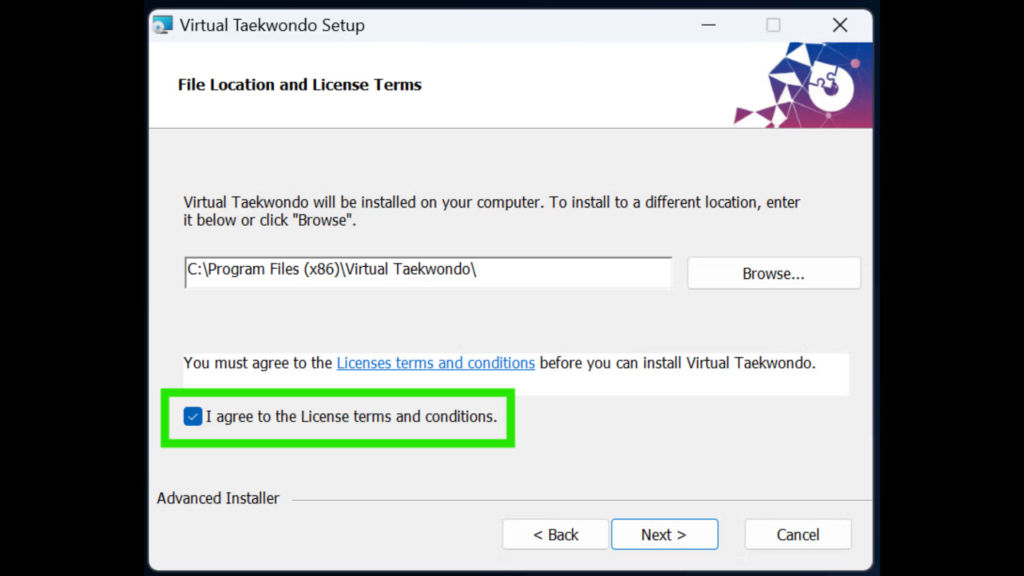
- Tick the checkbox about “I agree to the License…”.
- Click on ‘Install’.
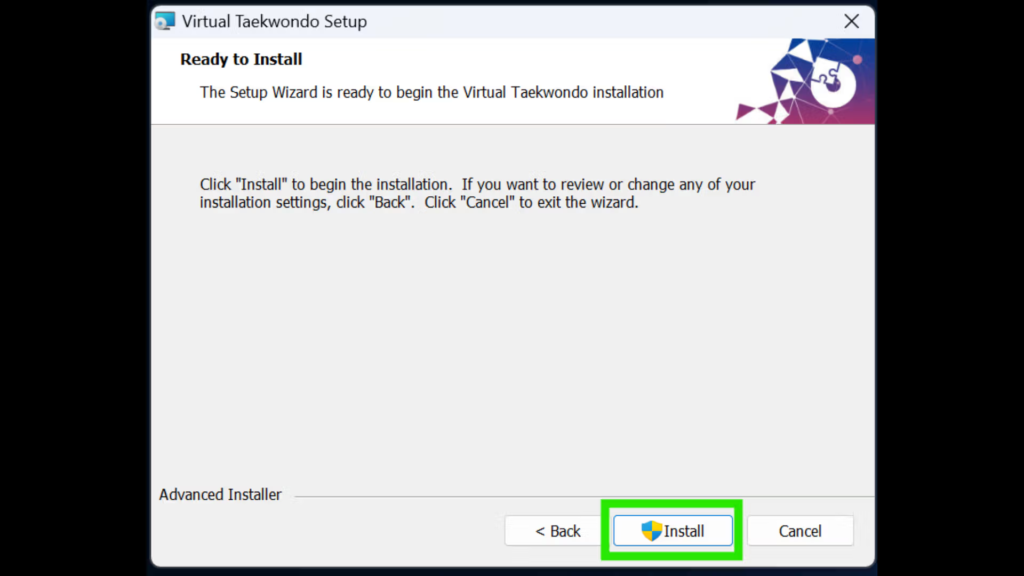
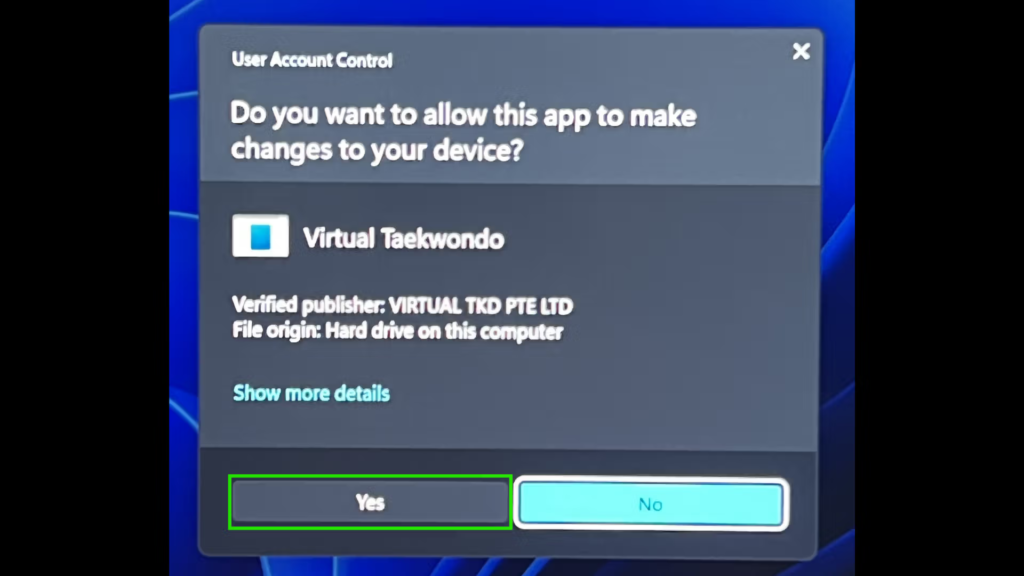
vi. If Windows prompts a pop-up asking permission to make changes, click ‘Yes’.
- Once installation is done, click on ‘Finish’.
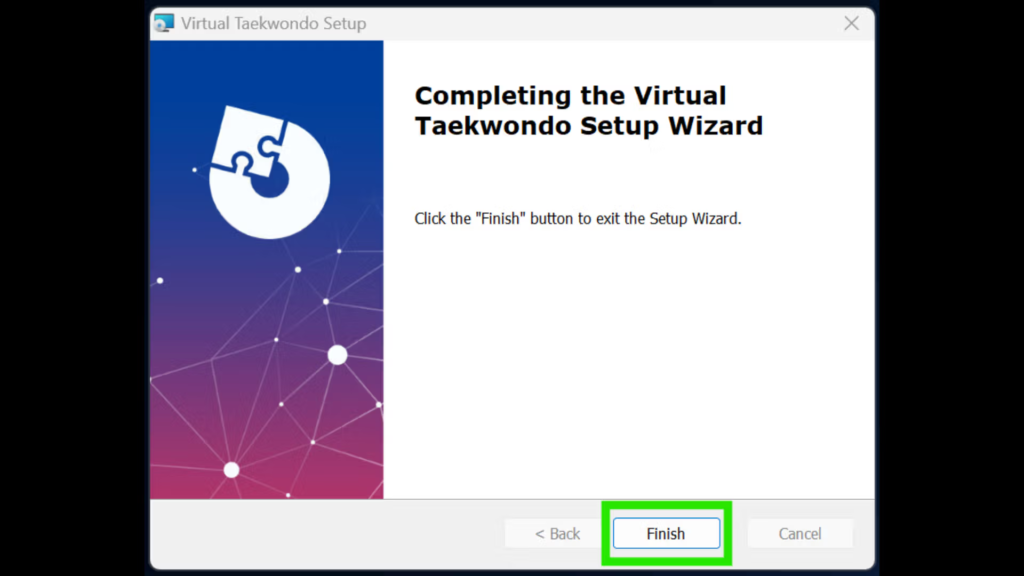
- A “VTKDUPlayer” application shortcut will appear on your desktop.
b. PICO4 VR Headset Installation (Players)
*Before proceeding with the Headset installation, be sure to have completed the necessary setup for your PICO4 device and updated it to the latest version. You may refer to the PICO Setup.
- Turn on the headset.
- Connect the headset to PC via USB-C. PICO4 will appear as a drive on your PC.
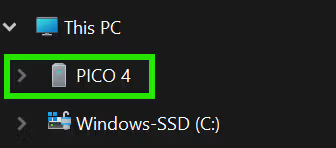
- Locate the “Android-PICO…”downloaded game file on your PC, as explained in VKTD Account Setup & Build Download.
- Right-click on ‘Android-PICO…’, then select and click ‘Extract All…’.
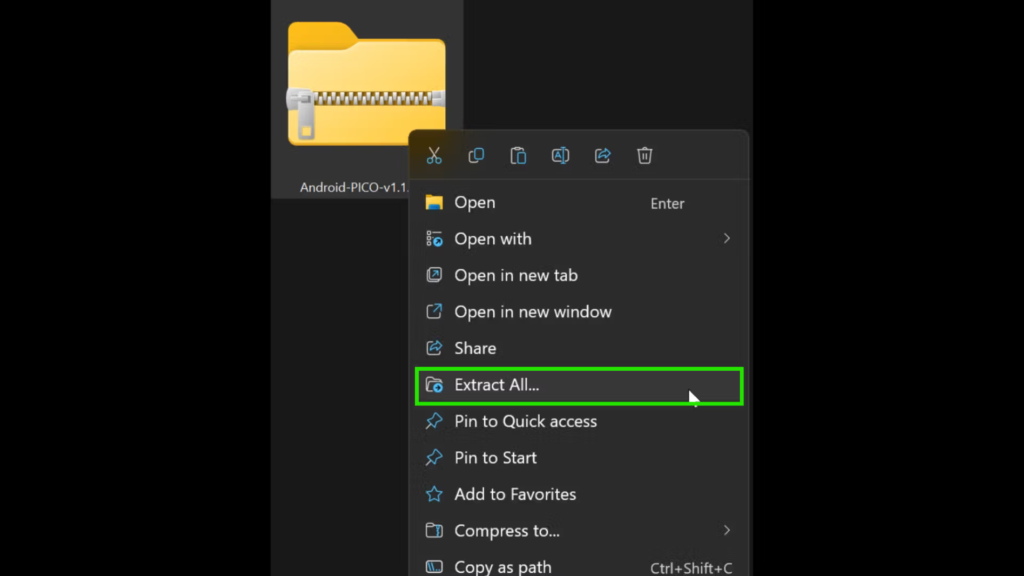
- Specify the path of the extracted file or just use default and click ‘Extract’.
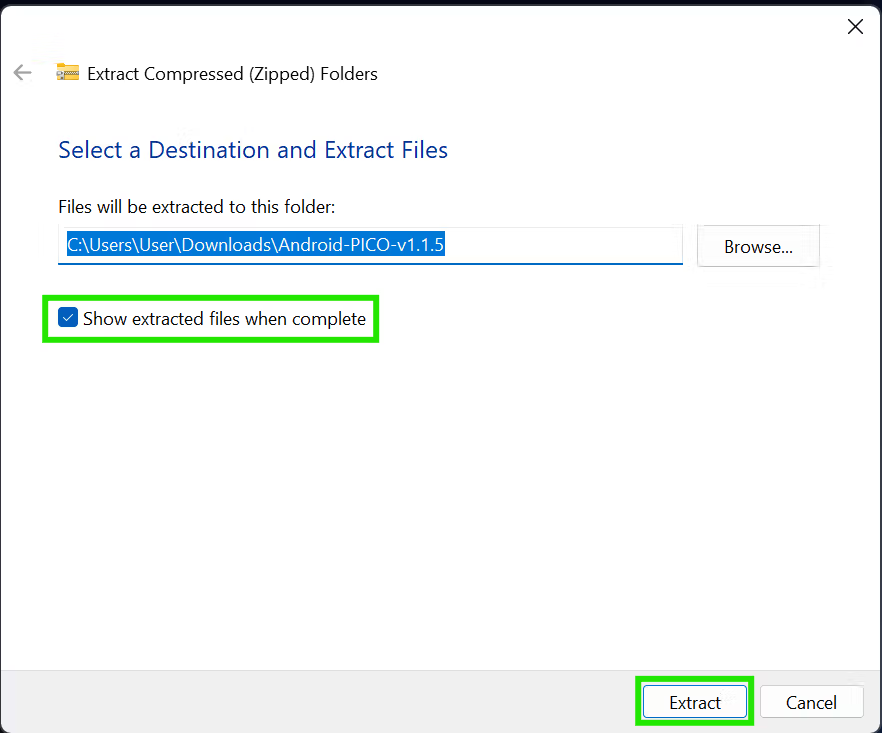
- Once files are extracted, locate the “Android-PICO…” folder.
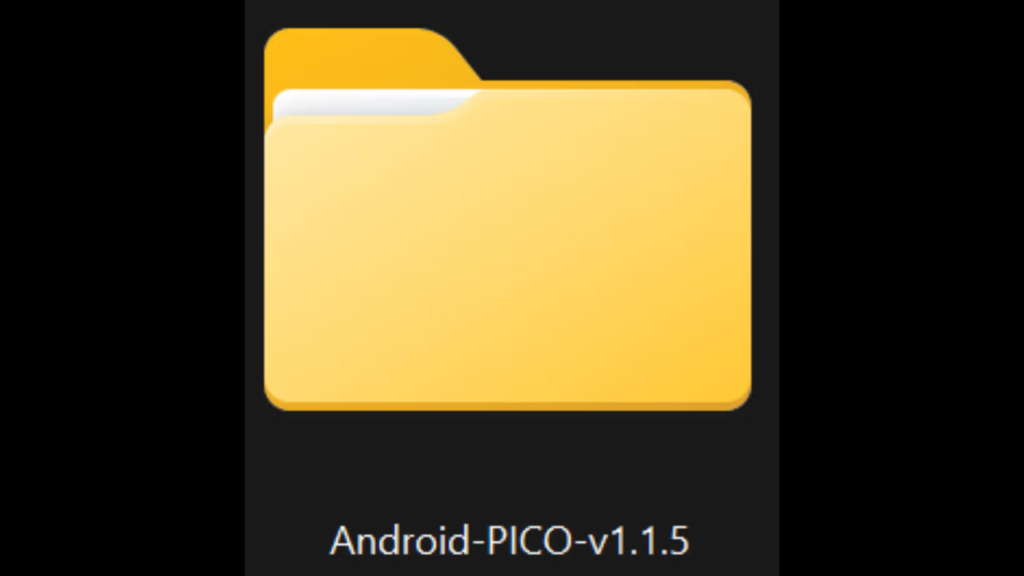
Note: If you have difficulty extracting the folder, try using the WinRAR application.
- Within the “Android-PICO…” folder, locate the “Android_Install.bat” file.
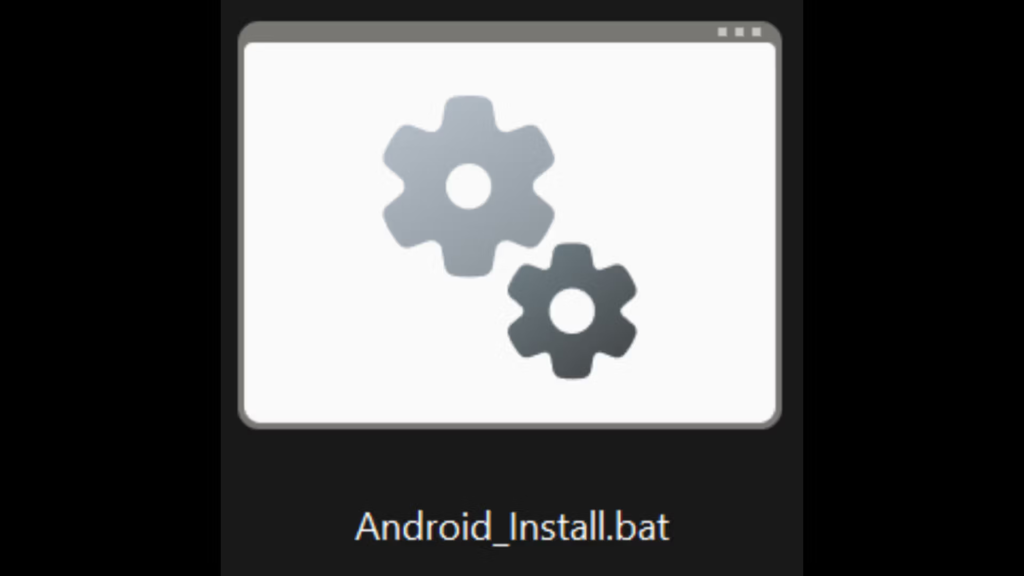
- Double click on the “Android_Install.bat” file and the installation will start.
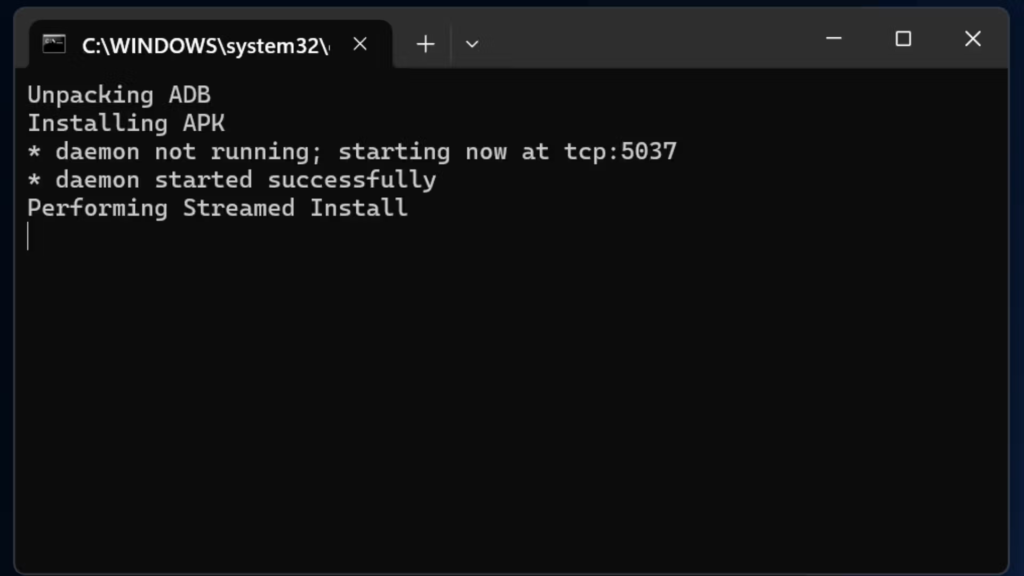
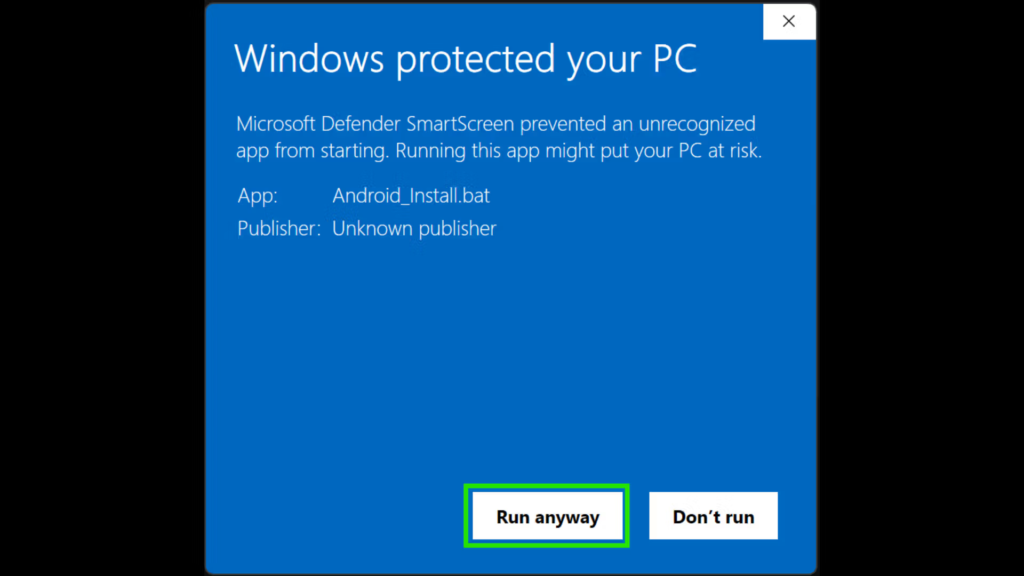
If Windows prompts “Windows protected…”, click ‘More Info’ and ‘Run anyway’.
- Once the installation is completed, there will be a “…Success…” indication; you can now disconnect the PICO4 from the PC.
Video reference:
5. Types of Calibration
Done before the event
A. Magnetometer Calibration (PC and AXIS)
Done during the event
B. In-Game Calibration (VR Headset and AXIS) [Example in ‘Quick Start’ document]
A. Magnetometer Calibration (PC and AXIS)
The Magnetometer Calibration is required to calibrate the magnetometer of the AXIS motion trackers to ensure they correctly identify the direction of the earth’s magnetic field, and not to other magnetic interferences. This only needs to be done ONCE before the event.
Here are the steps to doing a Magnetometer Calibration:
- Plug in your AXIS dongle to your PC
- Open the AXIS Control Center application on your PC
- Detach the charger from the charging dock
- Turn on all the nodes in the charging dock
- Close the lid of the charging dock (if applicable)
- Start Magnetometer Calibration
- X-axis: Flip the charging dock along the X-axis
- Z-axis: Flip the charging dock along the Z-axis
- Y-axis: Rotate the charging dock along the Y-axis
Video reference:
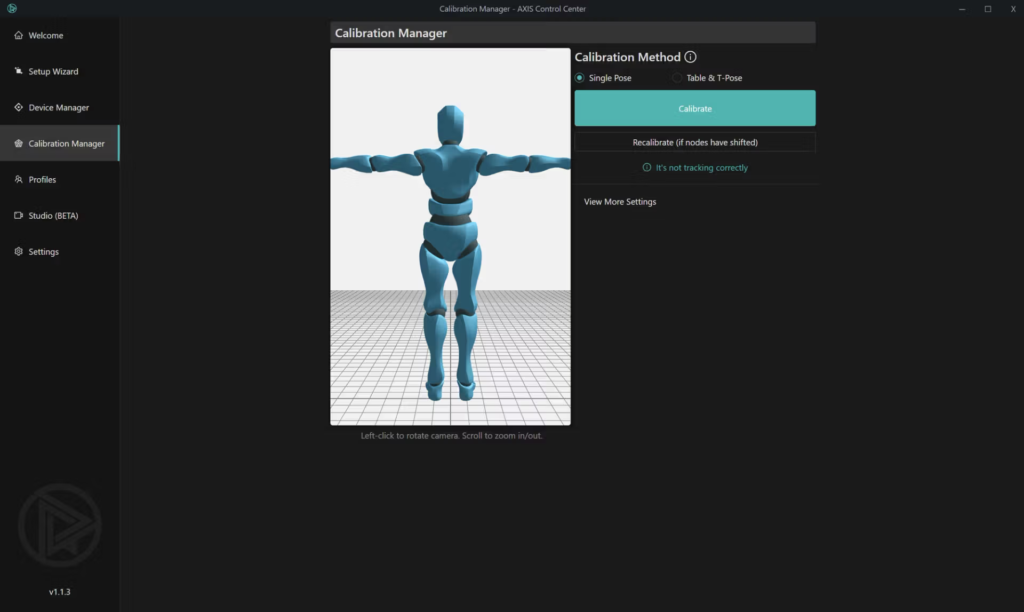
g. Go to the ‘Calibration Manager’ tab, on select the ‘Single Pose’ Calibration Method. Click on ‘Calibrate’.
i. Click on ‘Calibrate’ in the ‘T-Pose Calibration’ pop-up.
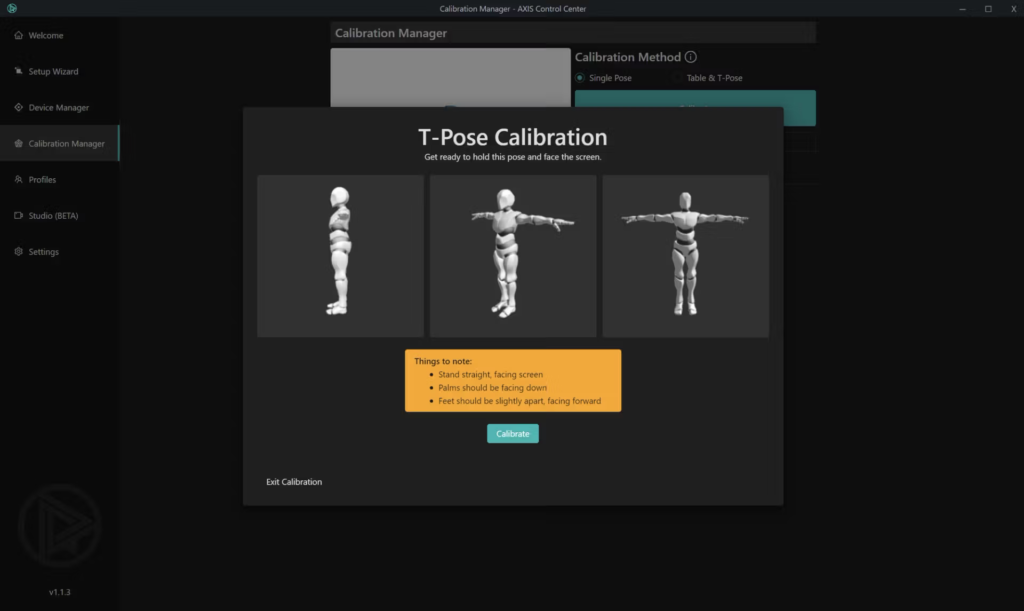
ii. A 3 second countdown timer will begin, and disappear once the calibration is done.
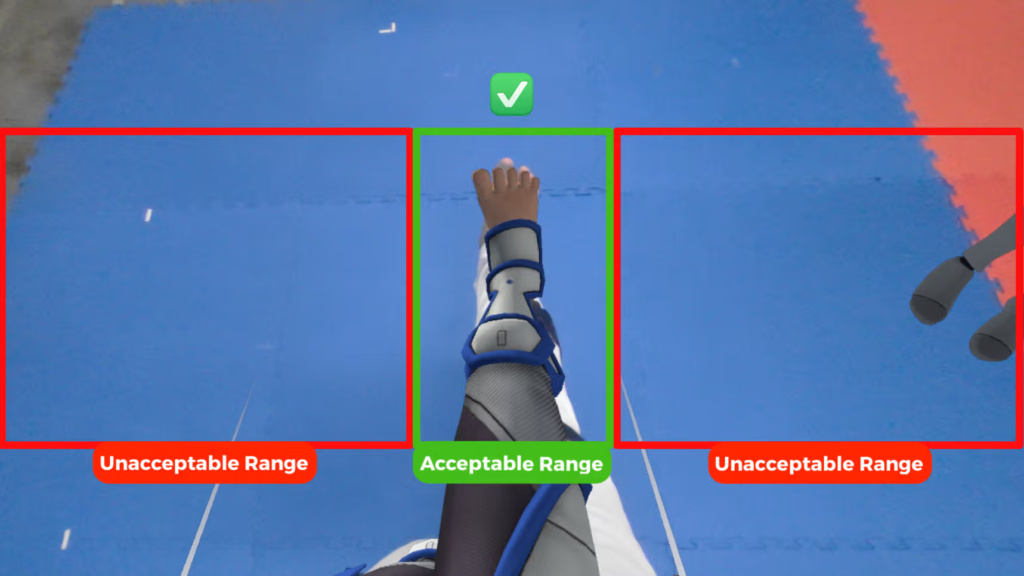
Note: The offset between the avatar legs (in VR) and their physical legs should be no more than 1 foot inward or outward. Any alignment with an offset greater than 1 foot should be treated as unacceptable.